
Sweetest Cherry Pie Bars Recipe for Your Dessert Table
Sweet summer memories flood back when you bite into these delightful cherry pie bars that combine nostalgic flavors with modern baking simplicity.
Memories of grandma’s kitchen drift through every crumbly, fruity layer.
Carefully selected ingredients dance together, creating a dessert that feels both comforting and exciting.
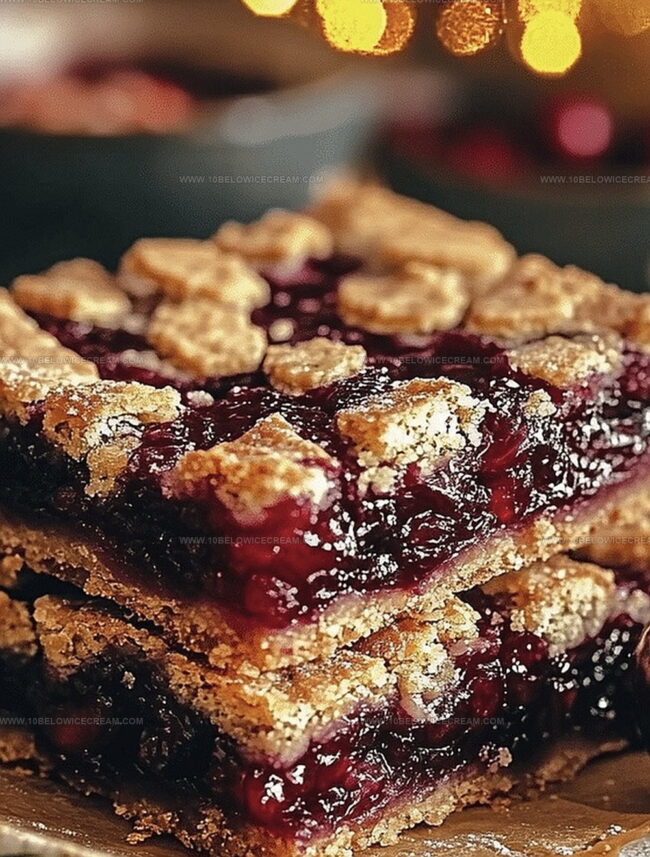
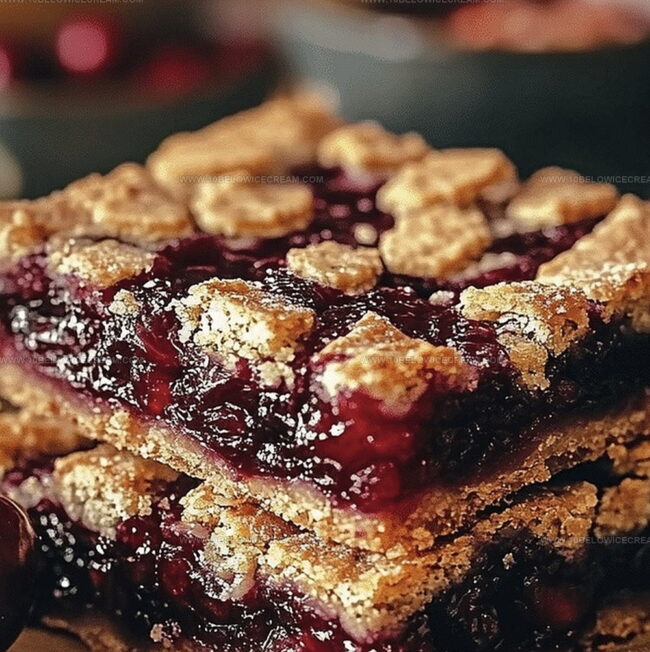
Fresh cherries bring vibrant color and tangy brightness to each delectable square.
Buttery crust provides a perfect golden foundation for the luscious fruit filling.
Minimal effort yields maximum satisfaction with this straightforward recipe.
You’ll find these bars irresistible and want to share them with everyone at your next gathering.
Why Cherry Pie Bars Are So Sweet And Simple
What You’ll Need For Cherry Pie Bars
For the Base:For the Fat:For the Filling:For the Glaze:Easy Steps To Make Cherry Pie Bars
Step 1: Prepare Baking Station
Warm up the oven to 375°F and line a 9×13-inch baking pan with parchment paper, letting extra paper hang over the edges for easy bar removal later.
Step 2: Mix Dry Ingredients
Grab a large mixing bowl and blend flour, sugar, baking powder, and salt until everything looks perfectly combined and smooth.
Step 3: Create Crumbly Texture
Chop cold butter into the dry mixture using a pastry cutter or fingertips. Work the butter until the mixture looks like rough, uneven crumbs with a sandy consistency.
Step 4: Form Soft Dough
Crack an egg into the crumbly mixture and gently stir until a soft, slightly sticky dough develops.
Step 5: Build First Layer
Take about two-thirds of the dough and press it firmly and evenly into the prepared baking pan, creating a solid foundation for the cherry bars.
Step 6: Prepare Cherry Filling
In a separate bowl, combine:Toss ingredients until cherries are completely coated and glossy.
Step 7: Spread Cherry Layer
Distribute the cherry mixture across the prepared crust, making sure every inch is covered with fruity goodness.
Step 8: Add Crumble Topping
Scatter the remaining dough over the cherry filling, creating an intentionally uneven and rustic-looking surface.
Step 9: Bake To Perfection
Slide the pan into the preheated oven and bake for 40-45 minutes. Watch for a golden-brown top and bubbling cherry filling that signals deliciousness is ready.
Step 10: Cool Completely
Remove from oven and let the bars rest in the pan for about an hour, allowing everything to set and cool down.
Step 11: Make Vanilla Glaze
Whisk together powdered sugar, milk, and vanilla extract until you have a smooth, drizzle-ready glaze.
Step 12: Remove From Pan
Lift the bars out using the parchment paper overhang and transfer to a cutting surface.
Step 13: Add Finishing Touch
Drizzle the vanilla glaze generously over the bars, letting it cascade and create beautiful patterns.
Step 14: Slice And Serve
Wait 10-15 minutes for the glaze to set, then cut into squares and serve at room temperature for maximum enjoyment.
Helpful Tips For Cherry Pie Bars That Work
Tasty Takes On Cherry Pie Bars
Best Pairings For Cherry Pie Bars
How To Store Cherry Pie Bars Properly
FAQs About Cherry Pie Bars Explained
Yes, you can use frozen cherries. Thaw and drain them completely before mixing with sugar and cornstarch to prevent excess moisture.
The mixture should resemble coarse crumbs and hold together when gently squeezed. Avoid overmixing to keep the texture light and crumbly.
Use two knives or your fingertips to cut the cold butter into the dry ingredients. The key is to work quickly to keep the butter cold.
Choose cherries that are firm and deep red. Overripe cherries can make the filling too watery and affect the bar’s texture.
Print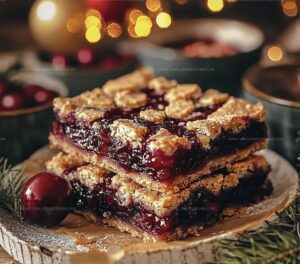
Cherry Pie Bars Recipe
- Total Time: 1 hour 10 minutes
- Yield: 9 1x
Description
Irresistible Cherry Pie Bars blend classic American dessert charm with convenient handheld convenience. Sweet cherry filling nestled between buttery crumble layers promises pure comfort you can savor in every delightful bite.
Ingredients
Crust and Topping:
- 2 cups all-purpose flour
- 1 cup granulated sugar
- 1/2 cup unsalted butter, cold and cubed
- 1 large egg
- 1 tsp baking powder
- 1/4 tsp salt
Filling:
- 4 cups fresh cherries, pitted
- 1/2 cup granulated sugar
- 2 tbsp cornstarch
- 1 tbsp lemon juice
Glaze:
- 1 cup powdered sugar
- 2–3 tbsp milk
- 1/2 tsp vanilla extract
Instructions
- Preheat the oven to 375°F and line a 9×13-inch baking pan with parchment paper, allowing excess to hang over the sides for easy removal.
- In a large mixing bowl, combine flour, sugar, baking powder, and salt, creating a uniform dry mixture.
- Cut the cold butter into the dry ingredients using a pastry cutter or your fingers until the mixture resembles coarse crumbs.
- Incorporate the egg into the crumbly mixture, gently mixing until a soft dough forms.
- Press approximately two-thirds of the dough firmly and evenly into the prepared baking pan, creating a compact base layer.
- In a separate bowl, toss the pitted cherries with sugar, cornstarch, and lemon juice until the cherries are thoroughly coated.
- Spread the cherry mixture evenly over the prepared crust, ensuring complete coverage.
- Crumble the remaining dough over the cherry filling, creating a rustic, uneven topping.
- Bake for 40-45 minutes, or until the top turns golden brown and the cherry filling becomes bubbly and slightly thickened.
- Remove from the oven and allow to cool completely in the pan for about 1 hour.
- Whisk powdered sugar, milk, and vanilla extract to create a smooth, drizzling glaze.
- Once cooled, lift the bars out using the parchment paper overhang and transfer to a cutting surface.
- Drizzle the vanilla glaze generously over the bars, allowing it to set for 10-15 minutes before slicing.
- Cut into squares and serve at room temperature.
Notes
- Adjust butter temperature carefully to ensure the perfect crumbly texture without overworking the dough.
- Drain cherries well to prevent excess liquid from making the bars soggy and compromising the base’s structural integrity.
- Replace fresh cherries with frozen ones by thawing and patting them dry completely before mixing with sugar and cornstarch.
- Customize the recipe for dietary needs by substituting gluten-free flour blend and using plant-based butter for a vegan-friendly version.
- Prep Time: 25 minutes
- Cook Time: 40-45 minutes
- Category: Desserts, Snacks
- Method: Baking
- Cuisine: American
Nutrition
- Serving Size: 9
- Calories: 250
- Sugar: 18 g
- Sodium: 100 mg
- Fat: 10 g
- Saturated Fat: 6 g
- Unsaturated Fat: 3 g
- Trans Fat: 0 g
- Carbohydrates: 36 g
- Fiber: 1 g
- Protein: 2 g
- Cholesterol: 30 mg
Jackson Reid
Founder & Recipe Developer
Expertise
Education
Holyoke Community College – HCC-MGM Culinary Arts Institute
Certificate in Culinary Arts
Focus: Farm-to-table cuisine, sustainable cooking practices, and hands-on kitchen training
Jackson’s love for cooking began one dish at a time. After earning his Culinary Arts Certificate from Holyoke Community College’s HCC-MGM Culinary Arts Institute, he focused on what mattered most: creating recipes that are simple to follow and full of flavor.
At 10 Below Ice Cream, Jackson brings together global influences and a less-is-more approach. His recipes reflect his belief that good food doesn’t need to be complicated; it just needs to make sense, taste great, and feel right.
When he’s not testing ingredients or adjusting seasonings, you’ll find him hiking near Asheville, exploring local markets, or chasing the best light for food photos.