Tangy Hot Pepper Jelly Cheesy Thumbprint Appetizers Recipe
Crafting delightful cheesy thumbprint appetizers with hot pepper jelly promises a zesty twist on classic party snacks.
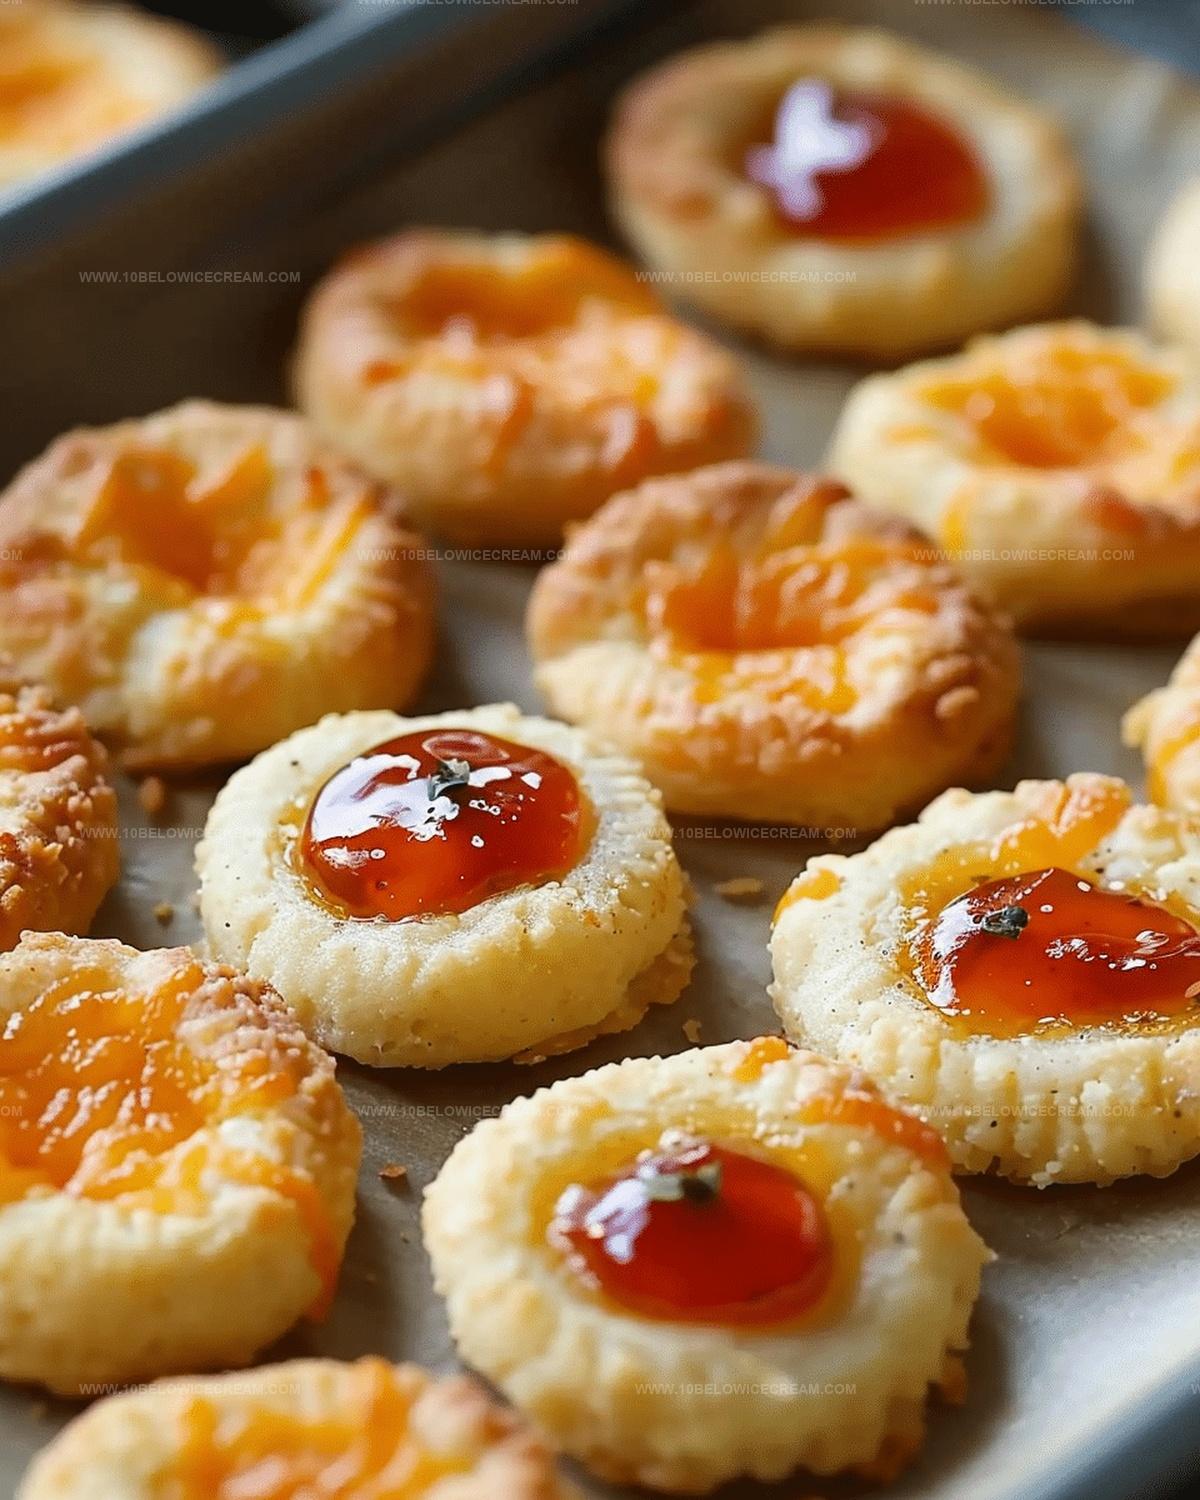
Crisp edges and molten centers make these bite-sized delights irresistible.
Each morsel delivers a perfect balance of creamy cheese and spicy-sweet jelly.
Small gatherings or large celebrations become memorable with these elegant little treats.
Guests will appreciate the unexpected kick from the pepper jelly.
Cheese lovers and spice enthusiasts unite around this simple yet sophisticated appetizer.
You cannot resist trying this crowd-pleasing recipe that takes minutes to prepare.
Why Cheesy Thumbprint Appetizers With Hot Pepper Jelly Stand Out
What You’ll Need For Cheesy Thumbprint Appetizers With Hot Pepper Jelly
For the Dough Base:For the Binding and Texture:For the Filling and Topping:Steps To Make Cheesy Thumbprint Appetizers With Hot Pepper Jelly
Step 1: Warm Up The Oven
Set your oven to a toasty 375°F and grab a baking sheet. Line it with parchment paper so nothing sticks.
Step 2: Mix Dry Ingredients
Grab a large mixing bowl and toss in:Stir everything together to create a delicious base for your pastry.
Step 3: Work In The Butter
Take cold butter and chop it into tiny cubes. Use your fingertips to blend the butter into the dry ingredients. Keep working until the mixture looks like rough breadcrumbs.
Step 4: Bring The Dough Together
Whisk an egg and gently fold it into the cheese-flour mixture. Knead the dough until it becomes a soft, slightly sticky ball.
Step 5: Shape The Pastry Balls
Roll the dough into small, even balls about the size of a walnut. Place them carefully on the prepared baking sheet, leaving some space between each one.
Step 6: Create Filling Wells
Press your thumb or the back of a small spoon into the center of each dough ball. Make a gentle indentation to hold the filling.
Step 7: Prepare The Cream Cheese Mixture
Soften cream cheese and mix it with finely chopped red bell peppers. This creates a vibrant and tasty filling.
Step 8: Add The Jelly
Spoon hot pepper jelly into the center of each pastry well. Be careful not to overfill.
Step 9: Bake To Perfection
Slide the baking sheet into the oven. Bake for 12-15 minutes until the edges turn a beautiful golden brown and the pastry looks crisp and puffy.
Step 10: Cool And Set
Remove the baking sheet from the oven. Let the appetizers rest for 5 minutes to help the jelly set and stabilize the pastry.
Step 11: Garnish With Herbs
Sprinkle freshly chopped chives over the top for a burst of fresh flavor.
Step 12: Serve And Enjoy
Transfer these zesty, cheesy bites to a serving platter. Enjoy them while they’re still warm and irresistible.
Tips For Cheesy Thumbprint Appetizers With Hot Pepper Jelly
Fun Twists On Cheesy Thumbprint Appetizers With Hot Pepper Jelly
What To Serve With Cheesy Thumbprint Appetizers With Hot Pepper Jelly
How To Store Cheesy Thumbprint Appetizers With Hot Pepper Jelly
FAQs For Cheesy Thumbprint Appetizers With Hot Pepper Jelly
The key ingredients are flour, cheddar cheese, butter, egg, cream cheese, red bell peppers, hot pepper jelly, and chives.
Yes, you can prepare the dough balls and filling in advance, storing them separately in the refrigerator. Assemble and bake just before serving for the best texture.
Lightly dust your hands with flour or keep them slightly damp to make rolling the dough easier and prevent sticking.
The hot pepper jelly adds a mild to moderate spice level, depending on the type of jelly you use. Choose a milder jelly if you prefer less heat.
Print
Cheesy Thumbprint Appetizers With Hot Pepper Jelly Recipe
- Total Time: 37-35 minutes
- Yield: 8 1x
Description
Culinary magic shines through these cheesy thumbprint appetizers with hot pepper jelly, blending creamy richness with spicy-sweet notes. Guests will crave these irresistible bites that promise a perfect balance of flavor and texture in one delightful mouthful.
Ingredients
Cheese and Pastry:
- 2 cups all-purpose flour
- 1 cup shredded cheddar cheese
- 1/2 cup unsalted butter
- 1 large egg
- 1/4 tsp salt
Filling:
- 1/2 cup hot pepper jelly
- 2 tbsp red bell pepper, finely diced
Garnish and Additional Ingredients:
- 1 tbsp fresh chives, chopped
- 1/4 tsp black pepper
- 2 tbsp cream cheese, softened
Instructions
- Preheat the oven to 375°F and line a baking sheet with parchment paper, ensuring a smooth, even surface for your appetizers.
- In a large mixing bowl, combine flour, shredded cheddar cheese, salt, and black pepper, creating a savory base for the pastry dough.
- Cut cold butter into small cubes and incorporate into the dry ingredients, using your fingertips to blend until the mixture resembles coarse, crumbly breadcrumbs.
- Whisk the egg and gently fold it into the cheese-flour mixture, kneading until a cohesive, slightly sticky dough forms.
- Roll the dough into small, uniform balls, approximately 1-inch in diameter, placing them evenly spaced on the prepared baking sheet.
- Using your thumb or the back of a small spoon, create a gentle indentation in the center of each dough ball, forming a well for the filling.
- Soften cream cheese and mix with finely diced red bell peppers, creating a vibrant, textured accompaniment.
- Carefully spoon hot pepper jelly into the center of each thumbprint, filling the wells without overflowing.
- Bake for 12-15 minutes, or until the edges turn golden brown and the pastry appears crisp and slightly puffy.
- Remove from the oven and let cool for 5 minutes on the baking sheet to set the jelly and stabilize the pastry.
- Sprinkle freshly chopped chives over the appetizers, adding a bright, herbaceous finish.
- Transfer to a serving platter and enjoy these zesty, cheesy bites while still warm.
Notes
- Ensure butter is cold for flakier, more tender pastry that crumbles perfectly in your mouth.
- Room temperature ingredients help bind the dough smoothly without overworking the mixture.
- Use sharp cheddar cheese for maximum flavor intensity and a more pronounced cheesy profile.
- Gluten-free bakers can substitute regular flour with almond or gluten-free blend for similar texture.
- Chill the dough for 15 minutes before shaping to prevent spreading and maintain crisp thumbprint edges.
- Experiment with different pepper jellies like jalapeño or mango for unique flavor variations.
- Vegetarian-friendly appetizer that can be prepared ahead and reheated before serving.
- Store leftovers in an airtight container for up to 3 days, recrisping in oven for best texture.
- Prep Time: 20 minutes
- Cook Time: 12-15 minutes
- Category: Appetizer, Snacks
- Method: Baking
- Cuisine: American
Nutrition
- Serving Size: 8
- Calories: 210
- Sugar: 3 g
- Sodium: 150 mg
- Fat: 14 g
- Saturated Fat: 8 g
- Unsaturated Fat: 4 g
- Trans Fat: 0 g
- Carbohydrates: 18 g
- Fiber: 1 g
- Protein: 4 g
- Cholesterol: 30 mg
Olivia Brooks
Contributing Writer
Expertise
Education
Culinary Institute of America
Accelerated Culinary Arts Certificate Program
Focus: Culinary fundamentals, nutrition, and healthy cooking technique
Olivia believes good food should feed both the body and the soul. She earned her Accelerated Culinary Arts Certificate from the Culinary Institute of America, where she focused on nutrition and practical cooking techniques that make healthy eating easy.
At 10 Below Ice Cream, Olivia shares single-serving recipes that are fresh, plant-forward, and full of heart. She loves helping people eat better, without stress, strict rules, or sacrificing flavor.
Beyond the kitchen, Olivia spends her time tending her backyard garden, practicing yoga, and discovering hidden gems in Portland’s food scene.