
Fun Pepperoni Pizza Bombs Recipe for Game Day Snacks
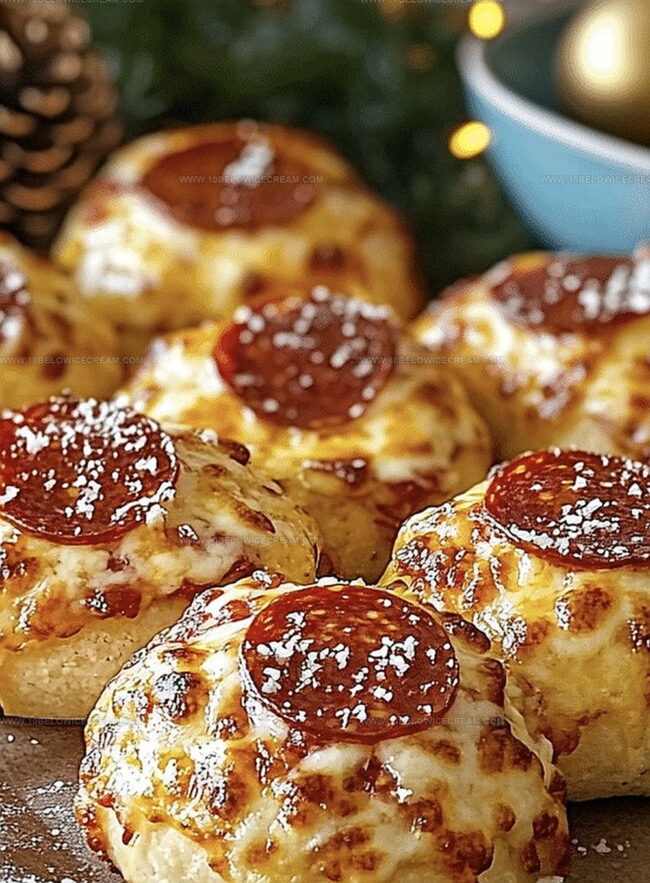
Pizza nights just got more exciting with these delectable pepperoni pizza bombs that burst with cheesy goodness in every bite.
Crispy on the outside and molten with melted mozzarella inside, these little flavor grenades will make you the star of any gathering.
Small pockets of dough wrap around savory pepperoni and gooey cheese, creating a handheld treat that feels like a complete pizza experience.
Packed with intense Italian-inspired flavors, each bite delivers a satisfying crunch and a warm, melty center.
Simple ingredients come together quickly, making these bombs perfect for spontaneous snacking or unexpected guests.
Kids and adults alike will devour these irresistible morsels faster than you can say “more cheese, please!” Prepare to become the culinary hero of your kitchen with this crowd-pleasing recipe that promises pure deliciousness.
Why Cheesy Pepperoni Pizza Bombs Are A Crowd Favorite
Everything Inside Cheesy Pepperoni Pizza Bombs
For the Base:For the Filling:For the Topping and Finishing:How To Bake Cheesy Pepperoni Pizza Bombs Easily

Step 1: Awaken the Yeast
Dissolve yeast in warm water, watching it transform into a bubbly, frothy mixture. Let it sit and activate for 5-7 minutes until it looks alive and foamy.
Step 2: Create Dough Base
In a spacious mixing bowl, combine:Craft a cozy well in the center, ready to welcome the yeast mixture and olive oil.
Step 3: Knead and Rise
Work the dough with your hands, transforming it into a smooth, elastic treasure. Knead for 8-10 minutes until it feels silky and soft. Transfer to a lightly oiled bowl and let it rest in a warm, draft-free spot for one hour, allowing it to puff up beautifully.
Step 4: Shape the Bombs
Gently deflate the risen dough and divide into 8-10 equal portions. Each piece becomes a potential flavor explosion.
Step 5: Fill with Deliciousness
Flatten each dough portion into a small circle. Dollop marinara sauce in the center of each round.
Step 6: Layer Flavor Makers
Top the sauce with:Carefully fold and seal the edges, creating compact flavor-packed balls.
Step 7: Prepare for Baking
Arrange the sealed pizza bombs on a baking sheet, ensuring they have breathing room and don’t touch.
Step 8: Final Rise and Heat
Let the bombs rest for 15 minutes. Preheat the oven to 375°F, building anticipation for the delicious transformation.
Step 9: Bake to Golden Perfection
Slide the baking sheet into the oven and bake for 15-18 minutes. Watch them turn a stunning golden brown with crispy edges.
Step 10: Add Finishing Touches
While piping hot, brush with a magical mixture of:Sprinkle with dried oregano and grated parmesan for an extra flavor punch.
Step 11: Cool and Serve
Let the pizza bombs rest for 5 minutes. This crucial moment allows the cheese to set and prevents tongue-burning mishaps. Serve and watch everyone’s eyes light up!
Smart Tips For Cheesy Pepperoni Pizza Bombs
Fun Styles Of Cheesy Pepperoni Pizza Bombs
Best Dips For Cheesy Pepperoni Pizza Bombs
Simple Storage For Cheesy Pepperoni Pizza Bombs
FAQs About Cheesy Pepperoni Pizza Bombs
Activating yeast in warm water ensures it’s alive and ready to help the dough rise, creating a fluffy and soft texture for your pizza bombs.
When the dough becomes smooth, elastic, and springs back when you press it, it’s ready. This typically takes 8-10 minutes of consistent kneading.
Yes, you can prepare the dough and form the bombs in advance. Cover them and refrigerate for up to 24 hours before baking, which can help develop deeper flavors.
Ensure edges are tightly sealed by pinching and pressing them together. A good seal prevents cheese and sauce from escaping while baking.
Print
Cheesy Pepperoni Pizza Bombs Recipe
- Total Time: 1 hour 33 minutes
- Yield: 4 1x
Description
Pepperoni pizza bombs deliver an explosion of melted cheese and savory pepperoni in one irresistible bite-sized snack. Crispy golden pastry wraps around zesty marinara and gooey mozzarella, promising a mouthwatering experience that brings Italian flavors right to your plate.
Ingredients
Dough:
- 2 cups all-purpose flour
- 1 packet active dry yeast
- 1/2 cup warm water
- 2 tbsp olive oil
- 1 tsp salt
Filling:
- 1 cup shredded mozzarella cheese
- 1/2 cup pepperoni slices
- 1/4 cup marinara sauce
Topping:
- 2 tbsp melted butter
- 1 tsp dried oregano
- 1/4 cup grated parmesan cheese
- 1 clove minced garlic
Instructions
- Activate the yeast by dissolving it in warm water, allowing it to foam and become frothy for about 5-7 minutes.
- In a large mixing bowl, combine flour and salt, creating a well in the center for the yeast mixture and olive oil.
- Knead the dough until smooth and elastic, approximately 8-10 minutes, then place in a lightly oiled bowl and let rise in a warm spot for 1 hour.
- Punch down the risen dough and divide into 8-10 equal portions.
- Flatten each dough portion into a small circle, placing a spoonful of marinara sauce in the center.
- Layer pepperoni slices and mozzarella cheese on top of the marinara, carefully folding and sealing the edges to create a compact ball.
- Arrange the sealed pizza bombs on a baking sheet, ensuring they are not touching.
- Preheat the oven to 375°F and let the formed bombs rest for 15 minutes before baking.
- Bake for 15-18 minutes until golden brown and crispy.
- While hot, brush with melted butter mixed with minced garlic and sprinkle with dried oregano and grated parmesan.
- Allow to cool for 5 minutes before serving to let the cheese set and prevent burning.
Notes
- Activate yeast carefully in lukewarm water, ensuring temperature is between 100-110°F to guarantee proper activation without killing the microorganisms.
- Knead dough thoroughly to develop gluten, creating a stretchy and smooth texture that helps pizza bombs hold their shape during baking.
- For gluten-free variation, substitute all-purpose flour with a high-quality gluten-free blend and add xanthan gum to improve dough elasticity.
- Experiment with alternative fillings like BBQ chicken, vegetarian options with roasted vegetables, or spicy jalapeño and cheese for diverse flavor profiles.
- Prep Time: 1 hour 15 minutes
- Cook Time: 15-18 minutes
- Category: Lunch, Dinner, Appetizer, Snacks
- Method: Baking
- Cuisine: Italian
Nutrition
- Serving Size: 4
- Calories: 280
- Sugar: 2 g
- Sodium: 480 mg
- Fat: 14 g
- Saturated Fat: 6 g
- Unsaturated Fat: 7 g
- Trans Fat: 0 g
- Carbohydrates: 30 g
- Fiber: 1 g
- Protein: 10 g
- Cholesterol: 20 mg
Jackson Reid
Founder & Recipe Developer
Expertise
Education
Holyoke Community College – HCC-MGM Culinary Arts Institute
Certificate in Culinary Arts
Focus: Farm-to-table cuisine, sustainable cooking practices, and hands-on kitchen training
Jackson’s love for cooking began one dish at a time. After earning his Culinary Arts Certificate from Holyoke Community College’s HCC-MGM Culinary Arts Institute, he focused on what mattered most: creating recipes that are simple to follow and full of flavor.
At 10 Below Ice Cream, Jackson brings together global influences and a less-is-more approach. His recipes reflect his belief that good food doesn’t need to be complicated; it just needs to make sense, taste great, and feel right.
When he’s not testing ingredients or adjusting seasonings, you’ll find him hiking near Asheville, exploring local markets, or chasing the best light for food photos.