Dreamy Homemade Banana Pudding Recipe: Sweet Comfort in a Bowl
Creamy banana pudding sends me straight back to childhood summers spent at my grandmother’s kitchen.
Sweet memories flood my mind with each smooth, velvety spoonful.
Layers of ripe bananas and delicate vanilla wafers create a nostalgic dessert that feels like a warm hug.
My family always requested this classic treat during reunions and special gatherings.
Southern comfort comes alive through simple, heartwarming ingredients carefully combined with love.
Soft, cloud-like textures meld together in a symphony of sweet comfort.
Whip up this dessert and watch faces light up with pure joy.
What To Pair With Banana Pudding
Storage Tips For Banana Pudding
Banana Pudding FAQs
Cornstarch helps thicken the pudding and prevents lumps, creating a smooth, creamy texture without making the dessert too heavy or starchy.
Tempering prevents eggs from scrambling by gradually raising their temperature, ensuring a silky smooth pudding without unwanted egg chunks.
The pudding is ready when it coats the back of a spoon and creates a clear path when you run your finger through it, which typically happens after 5-7 minutes of cooking.
Yes, you can prepare this banana pudding up to 24 hours in advance, which actually allows the flavors to develop more deeply and makes the cookies softer and more delicious.
Why Banana Pudding Is A Creamy Comfort Classic
Ingredients For Classic Banana Pudding
For the Base:For the Liquid Components:For the Layering and Finishing:How To Make Traditional Banana Pudding
Step 1: Blend Dry Ingredients
Toss cornstarch, sugar, and salt into a medium saucepan. Whisk them together until they form a smooth, even mixture that will help prevent any pesky lumps in your final pudding.
Step 2: Create Creamy Base
Slowly pour milk and heavy cream into the dry ingredients. Whisk continuously to develop a silky, completely smooth liquid foundation for your pudding.
Step 3: Prepare Egg Yolks
Carefully separate egg yolks from whites. Beat the yolks in a separate bowl until they transform into a pale, slightly thickened mixture with a gorgeous golden color.
Step 4: Temper Egg Mixture
Gently introduce a small amount of warm milk mixture into the beaten egg yolks. Stir constantly to prevent any unwanted curdling and ensure a perfectly smooth texture.
Step 5: Cook Pudding
Return the tempered egg mixture to the saucepan. Cook over medium heat, stirring constantly until the pudding thickens and starts to bubble, which typically takes about 5-7 minutes.
Step 6: Add Finishing Touches
Pull the saucepan off the heat. Stir in vanilla extract and butter, creating a luxurious, glossy pudding base that’s bursting with flavor.
Step 7: Prepare Banana Layers
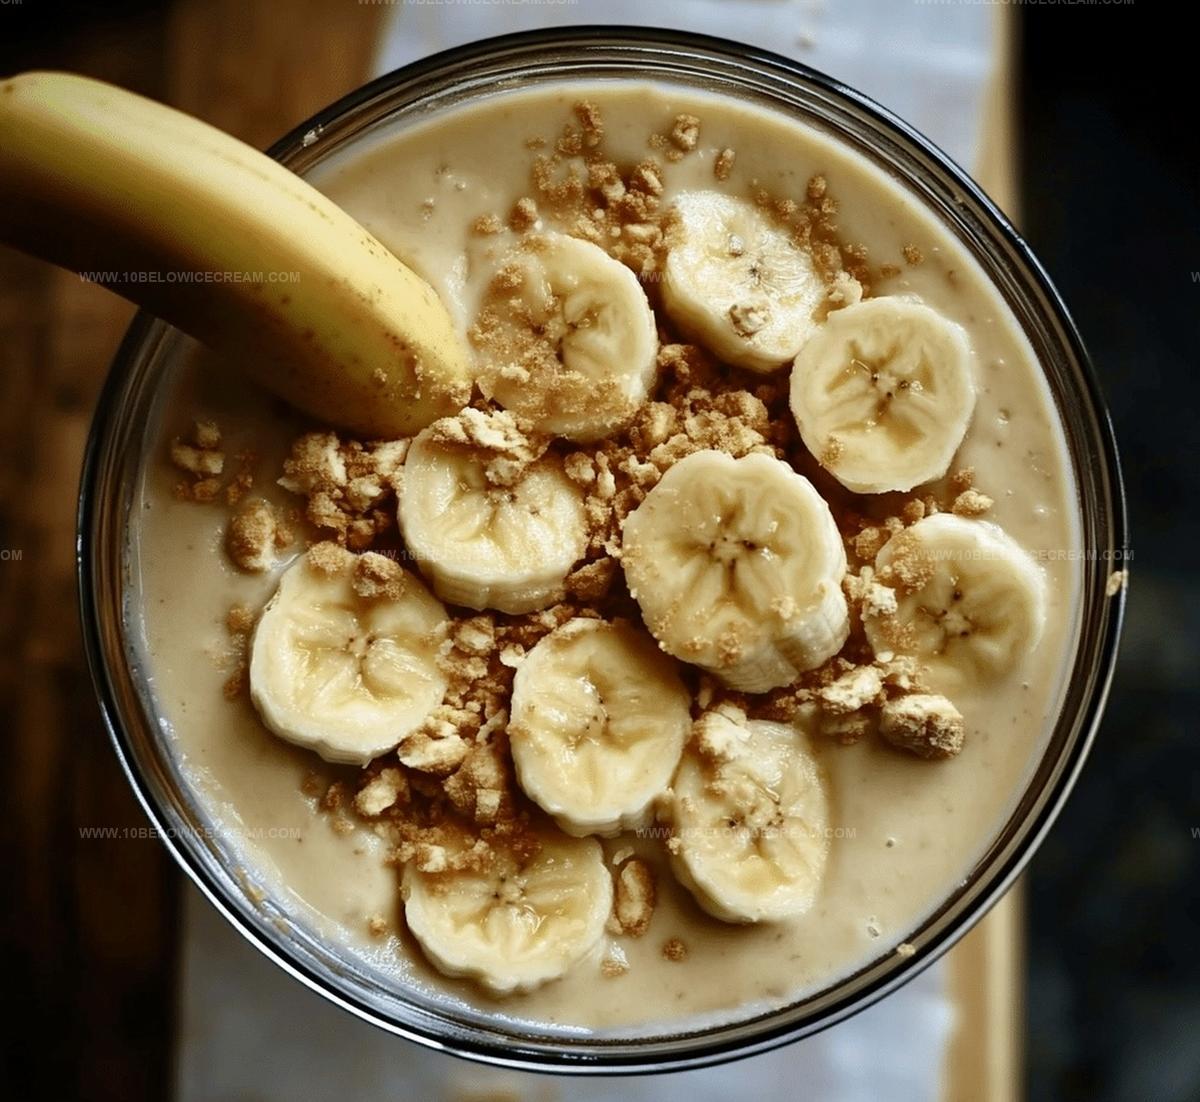
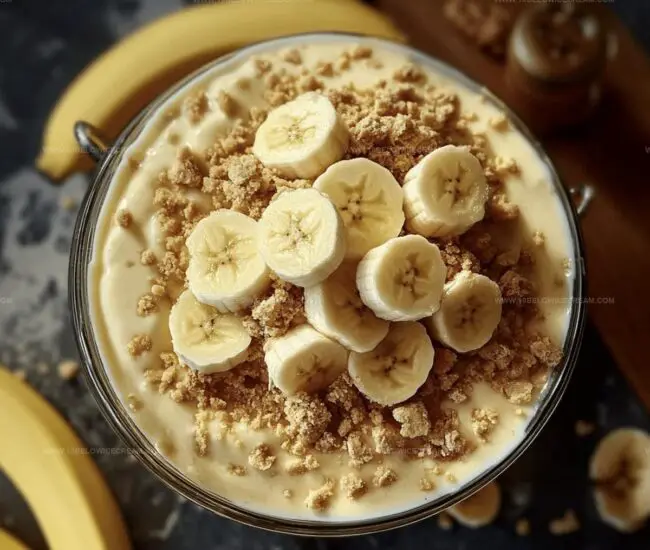
Slice ripe bananas into uniform, elegant rounds that will create beautiful layers in your dessert.
Step 8: Assemble Dessert Layers
In a serving dish, build delectable layers:Repeat these layers for a stunning presentation.
Step 9: Chill and Set
Refrigerate the dessert for at least 2 hours. This allows the flavors to mingle and the pudding to set into a perfect, creamy consistency.
Step 10: Final Garnish
Before serving, sprinkle powdered sugar over the top and add a generous dollop of whipped cream for an indulgent finishing touch.
Step 11: Serve and Enjoy
Keep chilled until ready to serve, ensuring the pudding maintains its dreamy, creamy texture and beautiful layered appearance.
Tips For Better Banana Pudding Layers
Variations To Upgrade Banana Pudding
Print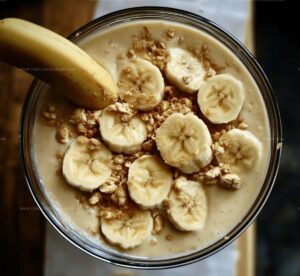
Banana Pudding Recipe
- Total Time: 2 hours 30 minutes
- Yield: 4 1x
Description
Southern comfort meets sweet nostalgia in this classic banana pudding that whispers memories of grandma’s kitchen. Creamy layers of vanilla custard, ripe bananas, and crisp vanilla wafers create a dessert that invites you to savor each delightful spoonful.
Ingredients
Main Ingredients:
- 4 ripe bananas
- 2 cups whole milk
- 1/2 cup heavy cream
- 3 large eggs
Thickening Agents:
- 1/3 cup cornstarch
- 1/2 cup granulated sugar
- 1/4 tsp salt
Garnish and Flavor Enhancers:
- 1 tsp vanilla extract
- 1 package vanilla wafer cookies
- 1/4 cup powdered sugar
- 2 tbsp unsalted butter
- Whipped cream for topping
Instructions
- Whisk together cornstarch, granulated sugar, and salt in a medium saucepan, creating a smooth dry mixture to prevent lumps in the pudding.
- Gradually pour milk and heavy cream into the dry ingredients, whisking continuously to ensure a silky, lump-free base.
- Separate egg yolks from whites, then gently beat yolks in a separate bowl until pale and slightly thickened.
- Temper the egg yolks by slowly adding a small amount of the warm milk mixture, stirring constantly to prevent curdling.
- Pour the tempered egg mixture back into the saucepan, stirring over medium heat until the pudding thickens and begins to bubble, approximately 5-7 minutes.
- Remove from heat and stir in vanilla extract and butter, creating a rich, glossy pudding base.
- Slice ripe bananas into uniform rounds, preparing them for layering.
- In a serving dish, create alternating layers of vanilla wafer cookies, banana slices, and the warm pudding mixture.
- Refrigerate the dessert for at least 2 hours to allow flavors to meld and pudding to set completely.
- Before serving, dust with powdered sugar and top with a generous dollop of whipped cream for a decadent finish.
- Chill until ready to serve, allowing the pudding to maintain its creamy consistency and layered texture.
Notes
- Prevent lumpy pudding by whisking dry ingredients thoroughly before adding liquid, ensuring a smooth base.
- Temper egg yolks carefully by slowly adding hot milk mixture to avoid scrambling, creating a silky custard texture.
- Choose ripe, firm bananas for optimal flavor and structural integrity when layering the dessert.
- Make this dessert gluten-free by substituting vanilla wafers with almond flour or gluten-free cookie alternatives.
- Prep Time: 20 minutes
- Cook Time: 10 minutes
- Category: Desserts, Snacks
- Method: Simmering
- Cuisine: American
Nutrition
- Serving Size: 4
- Calories: 380
- Sugar: 27 g
- Sodium: 120 mg
- Fat: 15 g
- Saturated Fat: 9 g
- Unsaturated Fat: 4 g
- Trans Fat: 0 g
- Carbohydrates: 52 g
- Fiber: 1 g
- Protein: 6 g
- Cholesterol: 90 mg
Olivia Brooks
Contributing Writer
Expertise
Education
Culinary Institute of America
Accelerated Culinary Arts Certificate Program
Focus: Culinary fundamentals, nutrition, and healthy cooking technique
Olivia believes good food should feed both the body and the soul. She earned her Accelerated Culinary Arts Certificate from the Culinary Institute of America, where she focused on nutrition and practical cooking techniques that make healthy eating easy.
At 10 Below Ice Cream, Olivia shares single-serving recipes that are fresh, plant-forward, and full of heart. She loves helping people eat better, without stress, strict rules, or sacrificing flavor.
Beyond the kitchen, Olivia spends her time tending her backyard garden, practicing yoga, and discovering hidden gems in Portland’s food scene.