
Heavenly Banana Loaf Recipe: Soft, Sweet, and Simply Irresistible
Warm memories of grandma’s kitchen dance through my banana loaf recipe, promising comfort in every slice.
Sweet aromas will soon fill your home with nostalgic warmth.
Soft, moist crumbs melt deliciously on your tongue.
Ripe bananas bring magic to this simple yet incredible treat.
Baking becomes an adventure when you mix these humble ingredients.
Delectable textures and rich flavors await your first bite.
Grab your mixing bowl and let’s create something extraordinary together.
Why Mary Berry Banana Loaf Is So Comforting
All You Need For Mary Berry Banana Loaf
Main Ingredients:Sweetening Ingredients:Leavening and Moisture Ingredients:Preparation Ingredients:Step-By-Step For Mary Berry Banana Loaf

Step 1: Prepare Baking Space
Grab a 2-pound loaf tin and coat it lightly with butter or cooking spray. Line the tin with parchment paper for easy removal. Preheat the oven to 350°F (180°C).
Step 2: Combine Wet Ingredients
Gather your ingredients:Toss all wet ingredients into a large mixing bowl and blend until smooth.
Step 3: Add Dry Ingredients
Incorporate into the wet mixture:Mix thoroughly using an electric mixer or wooden spoon until the batter becomes uniform and creamy.
Step 4: Transfer And Bake
Pour the batter into the prepared loaf tin, spreading it evenly with a spatula. Place the tin in the preheated oven and bake for approximately 60 minutes.
Step 5: Test For Doneness
Insert a skewer into the center of the bread. If it emerges clean or with minimal crumbs, the banana bread is ready.
Step 6: Cool And Release
Allow the bread to rest in the tin for 5 minutes. Carefully remove and transfer to a wire rack for complete cooling.
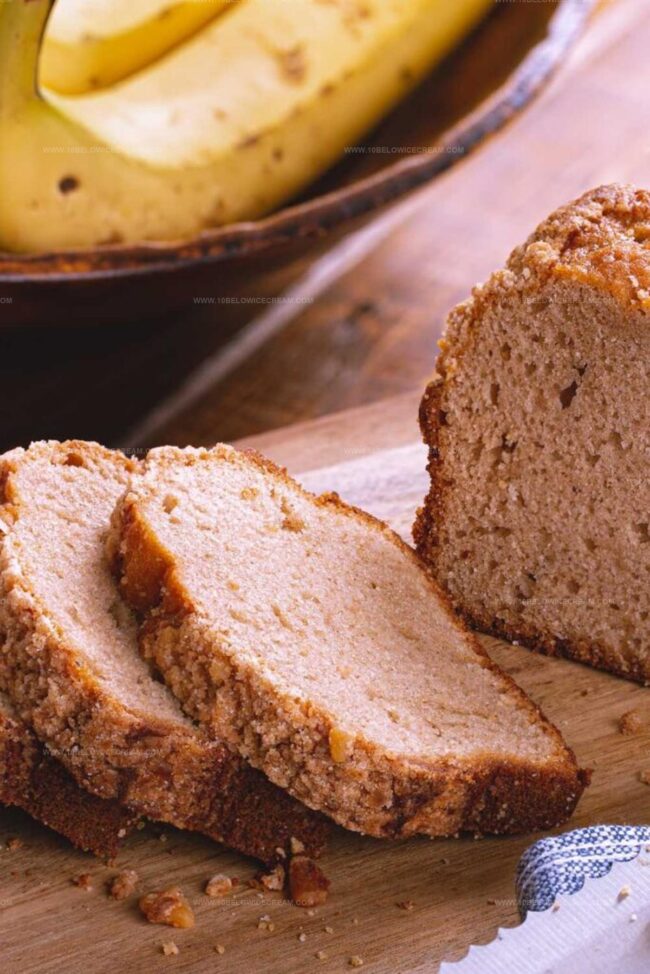
Step 7: Slice And Serve
Cut into thick, inviting slices. Enjoy with friends or solo as a delightful treat!
Tips For Perfect Mary Berry Banana Loaf
Creative Twists For Mary Berry Banana Loaf
Tasty Sides For Mary Berry Banana Loaf
How To Store Mary Berry Banana Loaf Right
FAQs For Mary Berry Banana Loaf
Yes! Overripe bananas are perfect as they’re sweeter and mash easily, giving your banana loaf more flavor and moisture.
You can substitute by adding 1½ teaspoons of baking powder and ¼ teaspoon of salt to each cup of all-purpose flour.
Insert a skewer or toothpick into the center – it should come out clean or with just a few crumbs, with no wet batter.
Absolutely! Use a wooden spoon and mix vigorously until ingredients are well combined, just avoid overmixing.
Print
Banana Loaf Recipe
- Total Time: 1 hour 15 minutes
- Yield: 8 1x
Description
Sweet banana loaf promises comfort and nostalgia in every slice, blending ripe fruit with warm spices for a delightful treat. Homemade goodness awaits you, with simple ingredients creating a memorable, moist bread perfect for sharing or savoring alone.
Ingredients
Main Ingredients:
- 2 ripe bananas, mashed
- 225 grams (8 ounces) self-raising flour
- 2 eggs
Sweeteners and Fats:
- 175 grams (6 ounces) caster sugar
- 100 grams (4 ounces) butter, softened
Leavening and Liquid:
- 1 teaspoon baking powder
- 2 tablespoons milk
Instructions
- Prepare a 2lb loaf tin by lightly greasing and lining with parchment paper. Preheat the oven to 180°C (350°F).
- Combine softened butter, caster sugar, eggs, mashed bananas, self-raising flour, baking powder, and milk in a large mixing bowl, ensuring all ingredients are at room temperature.
- Blend the ingredients using an electric mixer or wooden spoon until the mixture becomes smooth and well-incorporated, avoiding over-mixing.
- Transfer the batter into the prepared tin, carefully spreading it evenly with a spatula to create a uniform surface.
- Place the tin in the preheated oven and bake for approximately 55-60 minutes, monitoring the loaf’s golden-brown color and rising profile.
- Test the loaf’s doneness by inserting a skewer into the center; it should emerge clean or with minimal crumbs attached.
- Remove the loaf from the oven and allow it to rest in the tin for 5 minutes, helping it set and preventing potential crumbling.
- Gently remove the banana loaf from the tin and transfer to a wire rack, letting it cool completely to room temperature.
- Once cooled, slice the loaf into generous portions and serve, enjoying the moist, fragrant banana bread.
Notes
- Softening Bananas: Choose overripe bananas with dark brown or black spots for maximum sweetness and intense banana flavor.
- Mixing Technique: Avoid overmixing the batter to prevent a tough, dense texture; mix just until ingredients are combined for a tender crumb.
- Gluten-Free Adaptation: Swap self-raising flour with a gluten-free alternative like almond or coconut flour, adding 1 teaspoon of xanthan gum for better binding.
- Moisture Control: If bananas are extra wet, pat them dry with paper towels to prevent excess moisture from making the loaf soggy.
- Prep Time: 15 minutes
- Cook Time: 1 hour
- Category: Breakfast, Snacks, Desserts
- Method: Baking
- Cuisine: American
Nutrition
- Serving Size: 8
- Calories: 240 kcal
- Sugar: 16 g
- Sodium: 150 mg
- Fat: 11 g
- Saturated Fat: 7 g
- Unsaturated Fat: 3 g
- Trans Fat: 0.1 g
- Carbohydrates: 32 g
- Fiber: 2 g
- Protein: 3 g
- Cholesterol: 55 mg
Jackson Reid
Founder & Recipe Developer
Expertise
Education
Holyoke Community College – HCC-MGM Culinary Arts Institute
Certificate in Culinary Arts
Focus: Farm-to-table cuisine, sustainable cooking practices, and hands-on kitchen training
Jackson’s love for cooking began one dish at a time. After earning his Culinary Arts Certificate from Holyoke Community College’s HCC-MGM Culinary Arts Institute, he focused on what mattered most: creating recipes that are simple to follow and full of flavor.
At 10 Below Ice Cream, Jackson brings together global influences and a less-is-more approach. His recipes reflect his belief that good food doesn’t need to be complicated; it just needs to make sense, taste great, and feel right.
When he’s not testing ingredients or adjusting seasonings, you’ll find him hiking near Asheville, exploring local markets, or chasing the best light for food photos.