The Ultimate Bacon Cheeseburger Garlic Bombs Recipe for Dinner Joy
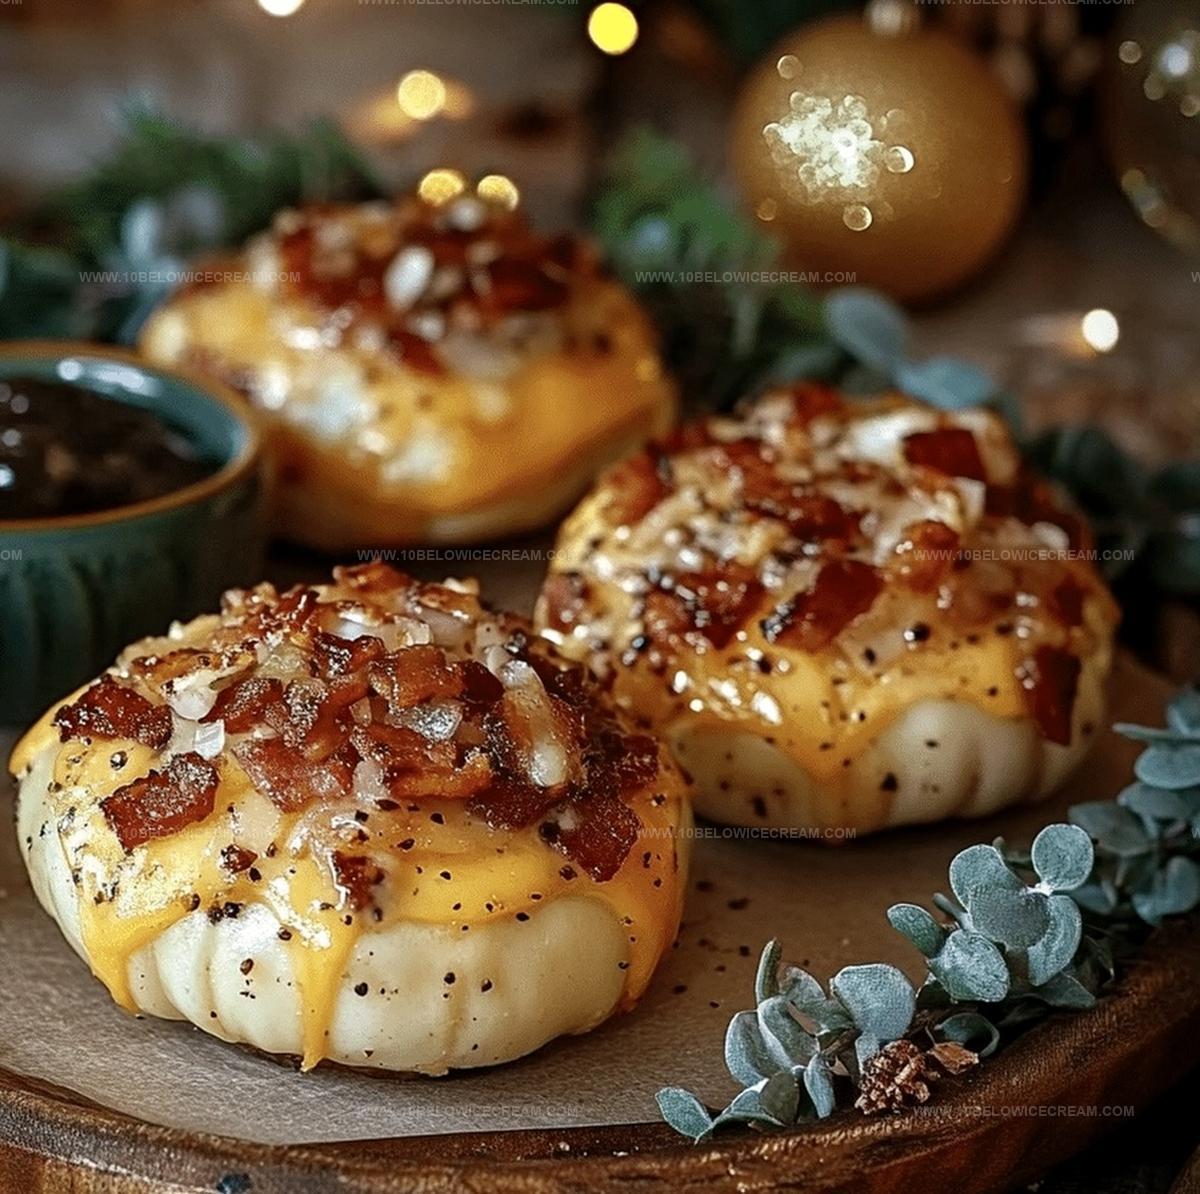
Crispy, golden bacon cheeseburger garlic bombs promise an explosion of flavor that’ll make your taste buds dance with joy.
Melted cheese oozes from inside these irresistible bites, creating a mouthwatering experience.
Packed with savory ingredients, each morsel delivers a punch of comfort food magic.
Garlic lovers will swoon over the intense aroma and rich, bold taste.
Small but mighty, these bombs combine the best elements of burgers and appetizers in one incredible package.
Gooey cheese, crisp bacon, and perfectly seasoned meat come together in a handheld delight that screams indulgence.
You won’t be able to stop at just one of these addictive little treasures – so roll up your sleeves and get cooking!
Why Bacon Cheeseburger Garlic Bombs Are Packed With Flavor
What You’ll Need For Bacon Cheeseburger Garlic Bombs
For the Meat:For the Cheese and Dairy:For the Seasonings and Base:How To Bake Bacon Cheeseburger Garlic Bombs
Step 1: Cook Crispy Bacon
Sizzle bacon in a skillet until perfectly crisp. Crumble into tiny pieces and let cool completely.
Step 2: Create Flavorful Meat Mixture
In a large mixing bowl, combine ground beef with:Blend seasonings thoroughly into the meat until well incorporated.
Step 3: Add Cheesy Goodness
Fold crumbled bacon and shredded cheddar cheese into the seasoned meat mixture. Ensure ingredients are evenly distributed throughout.
Step 4: Prepare Work Surface
Dust a clean countertop with flour to prevent dough from sticking.
Step 5: Shape Biscuit Rounds
Open biscuit package and separate each piece. Use flour-dusted hands to gently flatten each biscuit into a thin circle.
Step 6: Fill Biscuit Bombs
Place a compact portion of meat-cheese mixture in the center of each biscuit round.
Step 7: Seal the Bombs
Carefully fold and pinch dough edges, completely enclosing the filling. Create a tight, round bomb shape.
Step 8: Arrange on Baking Sheet
Position sealed bombs on a parchment-lined baking sheet. Ensure bombs are not touching each other.
Step 9: Butter the Exterior
Generously brush the outside of each bomb with melted butter to help create a golden, crispy crust.
Step 10: Bake to Perfection
Preheat oven to 375°F. Bake bombs for 15-18 minutes until the dough turns a deep golden brown and filling is fully cooked.
Step 11: Rest and Serve
Remove from oven and let bombs rest for 3-5 minutes. This allows internal temperature to stabilize before serving.
Tips For Gooey, Garlicky Cheeseburger Bombs
Tasty Twists On Bacon Cheeseburger Garlic Bombs
Perfect Pairings With These Savory Garlic Bombs
How To Store Bacon Cheeseburger Garlic Bombs The Right Way
FAQs About Bacon Cheeseburger Garlic Bombs
While delicious, they are not a low-calorie food. They’re packed with protein from beef and cheese but also contain significant fat from bacon and butter.
Absolutely! Ground turkey, chicken, or plant-based alternatives work well as substitutes for ground beef in this recipe.
Ensure edges are tightly pinched and sealed. Use flour when handling dough to help prevent sticking and create a better seal.
Gently patch the tear with a small piece of extra dough, pressing firmly to create a secure seal before baking.
Print
Bacon Cheeseburger Garlic Bombs Recipe
- Total Time: 38-43 minutes
- Yield: 6 1x
Description
Savory bacon cheeseburger garlic bombs deliver an explosive flavor experience that merges classic burger elements with irresistible appetizer magic. Melted cheese, crispy bacon, and herbed garlic butter create an indulgent bite you cannot resist.
Ingredients
Meat and Protein:
- 1/2 lb ground beef
- 6 slices bacon
- 1/2 cup shredded cheddar cheese
Dough and Wrapper:
- 1 package refrigerated biscuit dough
- 1/4 cup all-purpose flour (for dusting)
Seasonings and Aromatics:
- 2 cloves garlic, minced
- 1 tsp salt
- 1/2 tsp black pepper
- 1 tbsp dried parsley
- 2 tbsp melted butter
Instructions
- Prepare the bacon by cooking until crisp, then crumble into small pieces and set aside to cool completely.
- In a mixing bowl, combine ground beef, minced garlic, salt, black pepper, and dried parsley, blending the seasonings thoroughly into the meat.
- Incorporate the crumbled bacon and shredded cheddar cheese into the seasoned meat mixture, ensuring even distribution.
- Dust a clean work surface with flour to prevent sticking.
- Carefully separate each biscuit from the package, using flour-dusted hands to gently flatten each piece into a thin circle.
- Place a small, compact portion of the meat-cheese mixture in the center of each biscuit round.
- Carefully fold and pinch the edges of the dough, completely sealing the filling inside to create a tight, round bomb shape.
- Arrange the sealed bombs on a parchment-lined baking sheet, ensuring they do not touch each other.
- Brush the exterior of each bomb generously with melted butter, which will help create a golden, crispy exterior.
- Preheat the oven to 375°F and bake the bombs for 15-18 minutes, or until the dough turns a deep golden brown and the filling is cooked through.
- Remove from the oven and let rest for 3-5 minutes before serving to allow the internal temperature to stabilize.
Notes
- Select thick-cut bacon for maximum flavor and crispiness, ensuring it’s fully cooled to prevent soggy texture.
- Mix ground beef gently to avoid tough meat, maintaining a light touch during seasoning and blending.
- Consider using lean ground beef to reduce excessive greasiness while keeping the bombs juicy and flavorful.
- Experiment with different cheese varieties like pepper jack or smoked gouda for unique taste variations.
- Prep Time: 20 minutes
- Cook Time: 15-18 minutes
- Category: Lunch, Dinner, Appetizer, Snacks
- Method: Baking
- Cuisine: American
Nutrition
- Serving Size: 6
- Calories: 370
- Sugar: 1 g
- Sodium: 850 mg
- Fat: 26 g
- Saturated Fat: 10 g
- Unsaturated Fat: 14 g
- Trans Fat: 0 g
- Carbohydrates: 20 g
- Fiber: 1 g
- Protein: 16 g
- Cholesterol: 60 mg
Olivia Brooks
Contributing Writer
Expertise
Education
Culinary Institute of America
Accelerated Culinary Arts Certificate Program
Focus: Culinary fundamentals, nutrition, and healthy cooking technique
Olivia believes good food should feed both the body and the soul. She earned her Accelerated Culinary Arts Certificate from the Culinary Institute of America, where she focused on nutrition and practical cooking techniques that make healthy eating easy.
At 10 Below Ice Cream, Olivia shares single-serving recipes that are fresh, plant-forward, and full of heart. She loves helping people eat better, without stress, strict rules, or sacrificing flavor.
Beyond the kitchen, Olivia spends her time tending her backyard garden, practicing yoga, and discovering hidden gems in Portland’s food scene.