
Zesty Apple Chutney Recipe for Tangy Fall Flavor Bursts
Crafting a delightful apple chutney brings unexpected bursts of tangy sweetness to your culinary adventures.
Sweet and tart apples mingle with aromatic spices in this vibrant condiment.
Regional traditions inspire each unique twist on this classic preserve.
Warm kitchen aromas will dance around you while chopping fresh ingredients.
Cinnamon and ginger create a sophisticated depth that complements multiple dishes.
Homemade condiments always taste more authentic and personal than store-bought alternatives.
Experiment and savor the delicious results of your creative cooking journey.
What To Pair With Nigella Apple Chutney
Smart Ways To Store Nigella Apple Chutney
Answers To FAQs About Nigella Apple Chutney
You’ll need fresh apples, vinegar, sugar, onions, raisins, and spices like cinnamon and ginger. Most ingredients are common pantry staples.
Yes, use firm cooking apples like Granny Smith, Honeycrisp, or Braeburn. Avoid very soft apples that will break down quickly during cooking.
When properly sealed and stored in sterilized jars, apple chutney can last up to 6 months in a cool, dark pantry. After opening, refrigerate and consume within 2-3 weeks.
Why Nigella Apple Chutney Is Worth Making
Ingredients Needed For Nigella Apple Chutney
Fruits:Spices and Aromatics:Liquid and Sweeteners:Additional Ingredients:How To Make Nigella Apple Chutney Step By Step

Step 1: Prepare Apples
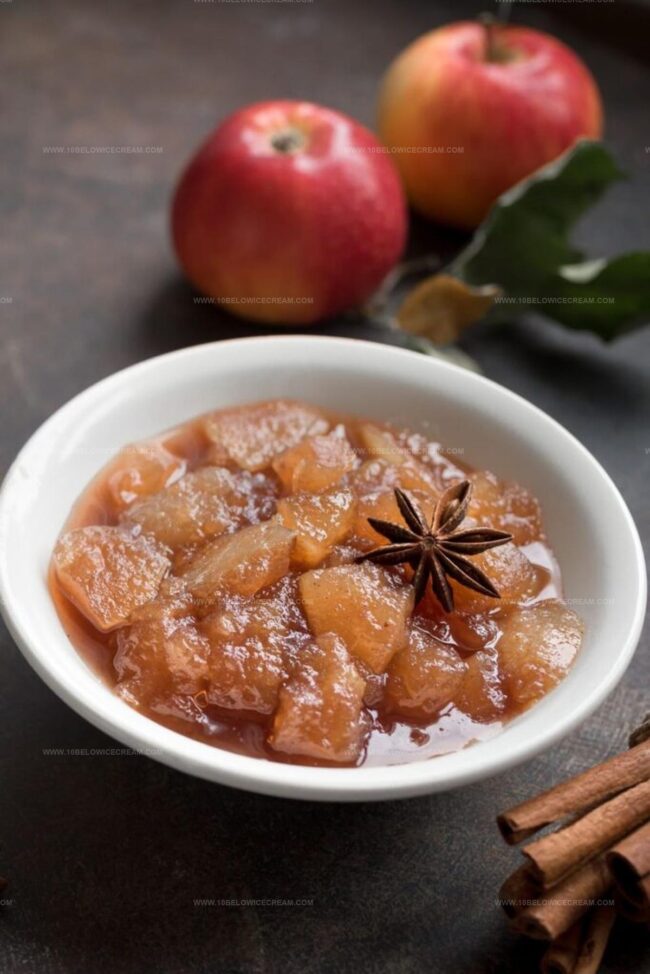
Wash your apples thoroughly under cool running water. Using a sharp peeler, remove the skin completely. Cut the apples in half and carefully remove the core with a paring knife. Chop the apples into small, bite-sized chunks that will cook down beautifully.
Step 2: Create Flavor Base
Gather your ingredients for the chutney:Toss all these ingredients into a medium-sized saucepan, mixing them gently to ensure even distribution of flavors.
Step 3: Simmer and Develop Flavors
Place the saucepan on the stove over medium heat. Bring the mixture to a rolling boil, then reduce the heat to low. Let the chutney simmer uncovered, allowing the ingredients to meld and break down. Stir the mixture every 10 minutes to prevent sticking and ensure even cooking.
Step 4: Check Consistency
Continue cooking for about 45 minutes. The chutney is ready when it becomes thick and syrupy, with the fruit softening and breaking down. The mixture should coat the back of a spoon and look glossy.
Step 5: Prepare Canning Jars
While the chutney simmers, sterilize your glass jars. Wash them in hot, soapy water, then rinse thoroughly. Place the clean jars in a pot of boiling water for 10 minutes to completely sterilize them.
Step 6: Jar and Seal
Carefully ladle the hot chutney into the sterilized jars, leaving a small space at the top. Wipe the jar rims clean with a damp cloth. Immediately place the lids on and seal tightly. Let the jars cool completely before storing.
Helpful Tips For Nigella Apple Chutney Success
Tasty Variations Of Nigella Apple Chutney To Try
Print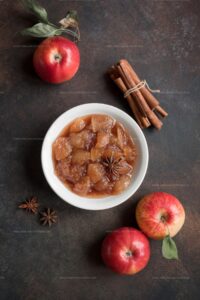
Apple Chutney Recipe
- Total Time: 55 minutes
- Yield: 4 1x
Description
Homemade apple chutney brings sweet and tangy flavors dancing across your palate with traditional Indian spices. Balanced between sharp cider vinegar and warm cinnamon, this condiment delivers complex layers perfect for pairing with savory dishes or spreading on artisan breads.
Ingredients
Main Ingredients:
- 4 cooking apples, chopped
- 1.5 cups (112 cups) dried cranberries
- 1 onion, finely chopped
Liquid and Sweetener:
- 1 cup (240 milliliters) cider vinegar
- 1 cup (200 grams) superfine sugar
Spices and Seasonings:
- 1 teaspoon ground ginger
- 1 teaspoon ground turmeric
- 1 teaspoon ground cumin
- 1 teaspoon ground coriander
- 2 teaspoons Maldon salt or 1 teaspoon table salt
Additional Equipment:
- 4 sterilized 250 milliliters (8.5 fluid ounces) jars with vinegar-proof lids
Instructions
- Meticulously peel, core, and dice apples into uniform bite-sized chunks for consistent texture.
- Transfer chopped apples into a medium-sized saucepan, incorporating all remaining ingredients to create a flavorful blend.
- Place pan over medium-high heat, allowing mixture to reach a robust boil while stirring gently.
- Reduce heat to low, maintaining a gentle simmer for approximately 45 minutes without covering the pan.
- Periodically stir the mixture, ensuring ingredients meld together and prevent potential scorching at the bottom.
- Monitor the chutney’s consistency, watching for a thickened texture and tender fruit that indicates proper cooking.
- Simultaneously prepare sterilized glass jars by thoroughly washing and heating them to prevent contamination.
- Once chutney reaches desired thickness and flavor intensity, carefully ladle the hot mixture into prepared jars.
- Immediately seal jars with clean lids, creating an airtight environment for preservation.
- Allow jars to cool completely at room temperature before storing in a cool, dark pantry.
Notes
- Choose firm, slightly tart apples like Granny Smith or Braeburn for the best flavor and texture in your chutney.
- Adjust sugar levels based on apple sweetness, tasting and adding more if needed during cooking process.
- Consider adding warming spices like cinnamon or ginger for extra depth and complexity in the chutney.
- Properly sterilized jars ensure longer shelf life and prevent bacterial growth, keeping your chutney fresh for months.
- Prep Time: 10 minutes
- Cook Time: 45 minutes
- Category: Appetizer, Snacks
- Method: Simmering
- Cuisine: Indian
Nutrition
- Serving Size: 4
- Calories: 172 kcal
- Sugar: 38 g
- Sodium: 600 mg
- Fat: 0.1 g
- Saturated Fat: 0 g
- Unsaturated Fat: 0.1 g
- Trans Fat: 0 g
- Carbohydrates: 45 g
- Fiber: 2.5 g
- Protein: 0.3 g
- Cholesterol: 0 mg
Jackson Reid
Founder & Recipe Developer
Expertise
Education
Holyoke Community College – HCC-MGM Culinary Arts Institute
Certificate in Culinary Arts
Focus: Farm-to-table cuisine, sustainable cooking practices, and hands-on kitchen training
Jackson’s love for cooking began one dish at a time. After earning his Culinary Arts Certificate from Holyoke Community College’s HCC-MGM Culinary Arts Institute, he focused on what mattered most: creating recipes that are simple to follow and full of flavor.
At 10 Below Ice Cream, Jackson brings together global influences and a less-is-more approach. His recipes reflect his belief that good food doesn’t need to be complicated; it just needs to make sense, taste great, and feel right.
When he’s not testing ingredients or adjusting seasonings, you’ll find him hiking near Asheville, exploring local markets, or chasing the best light for food photos.