
Dreamy Apple and Pear Pie Recipe: A Cozy Sweet Treat
Sweet aromas of cinnamon and homemade apple and pear pie waft through kitchens, promising comfort in every bite.
Memories of grandmother’s classic desserts dance across my mind, inspiring this delightful recipe.
Crisp autumn fruits merge perfectly in a golden, flaky crust that speaks of seasonal warmth.
Seasonal ingredients create magic when blended with care and traditional techniques.
Delicate slices reveal layers of tender fruit nestled beneath a buttery surface.
Baking this pie connects us to cherished culinary traditions that warm hearts and spark conversations.
You’ll savor each delectable forkful and feel transported to cozy family gatherings.
What To Love About Mary Berry Apple And Pear Pie
What’s Inside Mary Berry Apple And Pear Pie
Fruit Filling:Pastry Base:Finishing Touches:Simple How-To For Mary Berry Apple And Pear Pie

Step 1: Preheat Oven and Prepare Baking Surface
Set your oven to 425°F (220°C). Line a baking sheet with parchment paper for easy cleanup and to prevent sticking.
Step 2: Prepare Fruit Mixture
In a large mixing bowl, combine:Gently toss the fruit to coat evenly and let the flavors mingle.
Step 3: Roll Out Pastry Dough
On a lightly floured surface, roll out your pie crust into a large, thin circle. The dough should be wide enough to create beautiful, rustic edges.
Step 4: Arrange Fruit Filling
Transfer the rolled-out pastry to the prepared baking sheet. Pile the fruit mixture into the center of the dough, leaving a generous border around the edges for folding.
Step 5: Create Rustic Edges
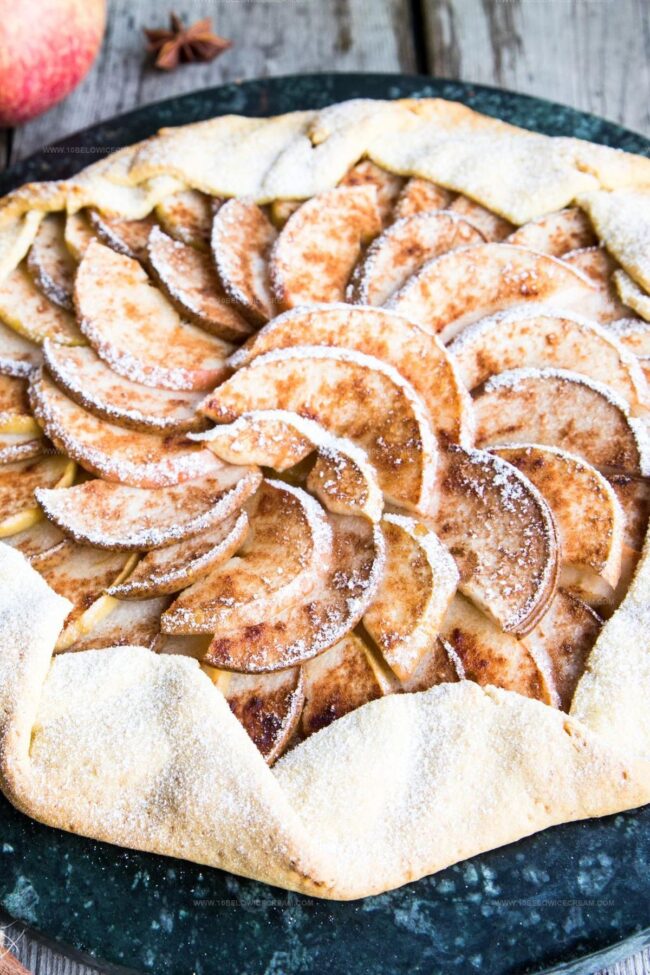
Carefully fold the pastry edges over the fruit, creating pleats and overlaps. The center should remain open to showcase the colorful fruit filling.
Step 6: Brush and Enhance
Whisk an egg and brush the exposed pastry edges with the egg wash. This will create a golden, shiny finish when baked.
Step 7: Add Final Touches
Sprinkle coarse sugar over the egg-washed edges for extra crunch and sweetness.
Step 8: Bake to Perfection
Slide the baking sheet into the preheated oven. Bake for 35-40 minutes until the crust turns a deep golden brown and the fruit looks bubbling and caramelized.
Step 9: Cool and Serve
Remove from the oven and let the galette cool for 15 minutes. Dust with powdered sugar using a fine-mesh sieve for a playful, delicate finish.
Tips You’ll Want For Mary Berry Apple And Pear Pie
Tasty Styles Of Mary Berry Apple And Pear Pie
Food Pairings With Mary Berry Apple And Pear Pie
How To Keep Mary Berry Apple And Pear Pie Fresh
Mary Berry Apple And Pear Pie Questions Answered
Lemon curd adds tangy sweetness and prevents fruits from browning, creating a brighter flavor and more vibrant pie filling that stays fresh looking.
Look for a golden-brown crust and bubbling fruit edges. The pastry should be crisp and the fruits soft but not mushy, indicating it’s ready to come out of the oven.
Absolutely! While apples and pears work wonderfully, you can experiment with similar firm fruits like quinces or a mix of stone fruits that hold their shape during baking.
Print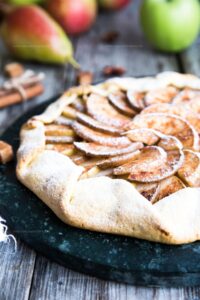
Apple and Pear Pie Recipe
- Total Time: 45 minutes
- Yield: 4 1x
Description
Rustic apple and pear pie brings classic comfort straight from grandma’s kitchen, blending sweet seasonal fruits with buttery pastry. Warm spices and flaky crust promise a delightful dessert you’ll savor with each memorable bite.
Ingredients
Main Fruits:
- 200 grams (7 ounces) Bramley apples, diced
- 2 ripe pears, diced
Pastry and Binding Ingredients:
- 500 grams (17.6 ounces) puff pastry block
- 1 egg, beaten
- 4 tablespoons lemon curd
Sweetening and Finishing Ingredients:
- 30 grams (1 ounce) demerara sugar
- Icing sugar for dusting
Instructions
- Preheat oven to 220°C and position a baking sheet on the lowest rack to catch any potential drips.
- Gently coat sliced apples and pears in a tangy lemon mixture, ensuring each piece is evenly glazed.
- Roll out pastry on a floured surface, creating a generous, free-form circle approximately 30 cm in diameter.
- Artfully arrange the fruit mixture in the center of the pastry, leaving a wide border around the edges for folding.
- Carefully fold the pastry edges inward, creating rustic pleats that partially cover the fruit’s perimeter.
- Generously brush the pastry with beaten egg, ensuring a rich, golden finish.
- Sprinkle a delicate layer of coarse sugar over the exposed pastry edges and fruit.
- Bake for 35-40 minutes until the crust transforms into a deep golden-brown and the fruit becomes tender and bubbling.
- Allow the galette to rest and cool for 15 minutes, allowing flavors to settle.
- Playfully dust the surface with a light snowfall of powdered sugar using a fine-mesh sieve.
Notes
- Ensure apples and pears are sliced evenly to guarantee uniform cooking and a consistent texture throughout the pie.
- Use cold butter and handle pastry minimally to create a flaky, tender crust that melts in your mouth.
- Add a pinch of cinnamon or nutmeg to the fruit mixture for an extra warming flavor that complements the sweet fruits.
- Gluten-free option: Swap traditional pastry with a gluten-free pie crust mix or almond flour-based dough for those with dietary restrictions.
- Prep Time: 15 minutes
- Cook Time: 30 minutes
- Category: Desserts
- Method: Baking
- Cuisine: American
Nutrition
- Serving Size: 4
- Calories: 340 kcal
- Sugar: 19 g
- Sodium: 150 mg
- Fat: 18 g
- Saturated Fat: 7 g
- Unsaturated Fat: 8 g
- Trans Fat: 0.5 g
- Carbohydrates: 40 g
- Fiber: 3 g
- Protein: 4 g
- Cholesterol: 60 mg
Jackson Reid
Founder & Recipe Developer
Expertise
Education
Holyoke Community College – HCC-MGM Culinary Arts Institute
Certificate in Culinary Arts
Focus: Farm-to-table cuisine, sustainable cooking practices, and hands-on kitchen training
Jackson’s love for cooking began one dish at a time. After earning his Culinary Arts Certificate from Holyoke Community College’s HCC-MGM Culinary Arts Institute, he focused on what mattered most: creating recipes that are simple to follow and full of flavor.
At 10 Below Ice Cream, Jackson brings together global influences and a less-is-more approach. His recipes reflect his belief that good food doesn’t need to be complicated; it just needs to make sense, taste great, and feel right.
When he’s not testing ingredients or adjusting seasonings, you’ll find him hiking near Asheville, exploring local markets, or chasing the best light for food photos.