The Soft, Heavenly Amish White Bread Recipe Everyone Loves
Crafting an authentic amish-white-bread brings warmth to any kitchen with its soft, pillowy texture.
Generations have passed down this simple yet magical recipe through close-knit communities.
Flour, yeast, and love combine to create something truly special.
Rich aromas will drift through your home as golden loaves rise slowly.
Each slice promises comfort and nostalgia, connecting you to traditional baking techniques.
Humble ingredients transform into something extraordinary with patient kneading and gentle care.
You’ll want to slice into this bread while it’s still warm and share its delicious magic.
Storing Homemade Amish-White-Bread
FAQs For Amish-White-Bread
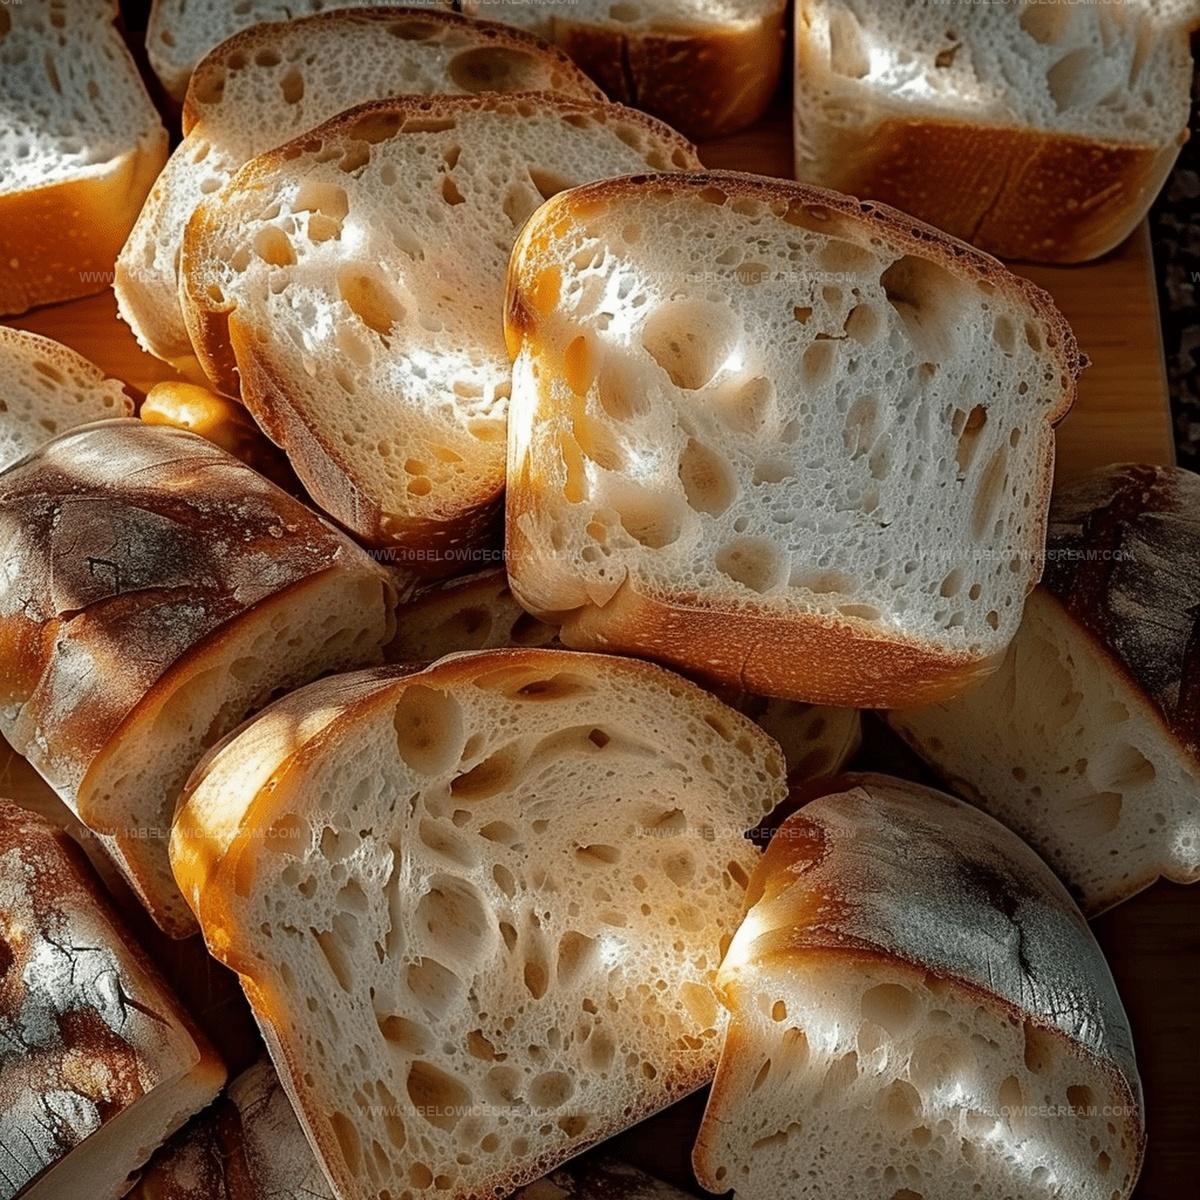
Bread flour is recommended because it has a higher protein content, which helps develop more gluten and creates a stronger, chewier bread texture with better rise and structure.
Test your yeast by mixing it with warm water and sugar. If it becomes frothy and bubbly within 5-7 minutes, the yeast is good to use. If no bubbles form, the yeast is likely expired and won’t work.
Kneading develops gluten, which gives bread its elasticity and helps it rise properly. Consistent kneading creates a smooth, stretchy dough that will result in a better bread texture and volume.
Why Amish-White-Bread Is A Simple Classic
What Goes Into Amish-White-Bread
For the Yeast:For the Liquid:For the Dry Ingredients:For the Fat and Oil:For the Optional Finishing:How To Make Amish-White-Bread At Home
Step 1: Wake Up the Yeast
Combine yeast with warm water and sugar in a spacious mixing bowl. Let the mixture bubble and transform for 5-7 minutes until it looks frothy and alive.
Step 2: Prepare Dry Ingredients
Sift bread flour and salt together in a separate container, creating a light and airy foundation for your bread.
Step 3: Merge Wet and Dry Ingredients
Slowly blend the dry ingredient mixture into the activated yeast liquid. Stir with a wooden spoon until a rough, shaggy dough emerges.
Step 4: Knead the Dough
Drizzle oil into the developing dough. Knead continuously on a floured surface for 8-10 minutes until the texture becomes smooth and silky.
Step 5: First Rise
Transfer the kneaded dough into a lightly oiled bowl. Cover with a clean kitchen towel and place in a warm, cozy spot. Let it rise for about 1 hour or until the dough doubles in size.
Step 6: Shape the Loaf
Punch down the risen dough to release trapped air. Shape it into a neat, compact loaf and place into a greased 9×5 inch bread pan.
Step 7: Second Rise
Allow the shaped loaf to rise again for 30-40 minutes. Watch it become puffy and beautifully rounded.
Step 8: Prepare the Oven
Heat the oven to 375°F (190°C) during the final rising period.
Step 9: Bake to Golden Perfection
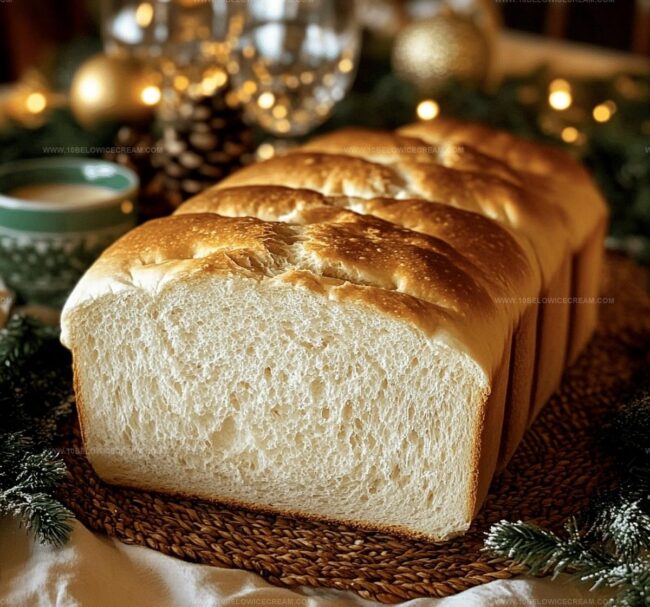
Bake the bread for 25-30 minutes. Look for a golden-brown crust that sounds hollow when tapped.
Step 10: Optional Finishing Touch
Brush the freshly baked loaf with melted butter for a glossy, rich appearance and enhanced flavor.
Step 11: Cool and Slice
Remove the bread from the pan and let it cool completely on a wire rack. This helps maintain its perfect structure before slicing.
Tips For Fluffy Amish-White-Bread
Fun Twists On Amish-White-Bread
Pairings That Work With Amish-White-Bread
Print
Amish-White-Bread Recipe
- Total Time: 1 hour 45-50 minutes
- Yield: 8 1x
Description
Homemade Amish White Bread brings warmth of traditional kitchens to your table with its pillowy texture and rich, comforting flavor. Simple ingredients and gentle kneading create a classic loaf that connects generations of baking love, inviting you to savor each slice with pure, nostalgic delight.
Ingredients
Flour and Dry Ingredients:
- 3 cups bread flour
- 1 packet active dry yeast
- 2 tbsp white sugar
- 1 tsp salt
Liquid Ingredients:
- 1 cup warm water
- 2 tbsp vegetable oil
Finishing Ingredient:
- 1 tbsp melted butter (optional, for brushing)
Instructions
- Activate the yeast by combining it with warm water and sugar in a large mixing bowl, allowing the mixture to become frothy and bubbly for approximately 5-7 minutes.
- Sift together bread flour and salt in a separate container, creating a light and airy dry ingredient base.
- Gradually incorporate the dry ingredient mixture into the activated yeast liquid, stirring with a wooden spoon until a shaggy dough begins to form.
- Drizzle vegetable oil into the developing dough, kneading continuously on a lightly floured surface for 8-10 minutes until the texture becomes smooth and elastic.
- Transfer the kneaded dough into a lightly oiled bowl, covering it with a clean kitchen towel, and allow it to rise in a warm, draft-free environment for about 1 hour or until the dough doubles in size.
- Punch down the risen dough to release trapped air, then shape it into a neat loaf and place into a greased 9×5 inch bread pan.
- Let the shaped loaf undergo a second rise for 30-40 minutes, allowing it to become puffy and slightly rounded.
- Preheat the oven to 375°F (190°C) during the final rising period.
- Bake the bread for 25-30 minutes, achieving a golden-brown crust that sounds hollow when tapped.
- Optional: Brush the freshly baked loaf with melted butter for a glossy, rich finish, enhancing both appearance and flavor.
- Remove from the pan and cool completely on a wire rack before slicing to maintain the bread’s structural integrity.
Notes
- Activate yeast with lukewarm water between 100-110°F to ensure perfect proofing without killing the delicate microorganisms.
- Knead dough thoroughly to develop gluten strands, creating a soft and tender bread texture with excellent crumb structure.
- Allow sufficient rising time in a warm, draft-free spot like near a preheated oven or inside a turned-off oven with the light on for consistent results.
- For gluten-free adaptation, substitute bread flour with a high-quality gluten-free flour blend and add xanthan gum to improve texture and binding.
- Prep Time: 15 minutes
- Cook Time: 25-30 minutes
- Category: Breakfast, Lunch, Dinner, Snacks
- Method: Baking
- Cuisine: American
Nutrition
- Serving Size: 8
- Calories: 150
- Sugar: 1.25 g
- Sodium: 0.19 g
- Fat: 2.5 g
- Saturated Fat: 0.3 g
- Unsaturated Fat: 2.2 g
- Trans Fat: 0 g
- Carbohydrates: 29 g
- Fiber: 1 g
- Protein: 4 g
- Cholesterol: 0 mg
Olivia Brooks
Contributing Writer
Expertise
Education
Culinary Institute of America
Accelerated Culinary Arts Certificate Program
Focus: Culinary fundamentals, nutrition, and healthy cooking technique
Olivia believes good food should feed both the body and the soul. She earned her Accelerated Culinary Arts Certificate from the Culinary Institute of America, where she focused on nutrition and practical cooking techniques that make healthy eating easy.
At 10 Below Ice Cream, Olivia shares single-serving recipes that are fresh, plant-forward, and full of heart. She loves helping people eat better, without stress, strict rules, or sacrificing flavor.
Beyond the kitchen, Olivia spends her time tending her backyard garden, practicing yoga, and discovering hidden gems in Portland’s food scene.