
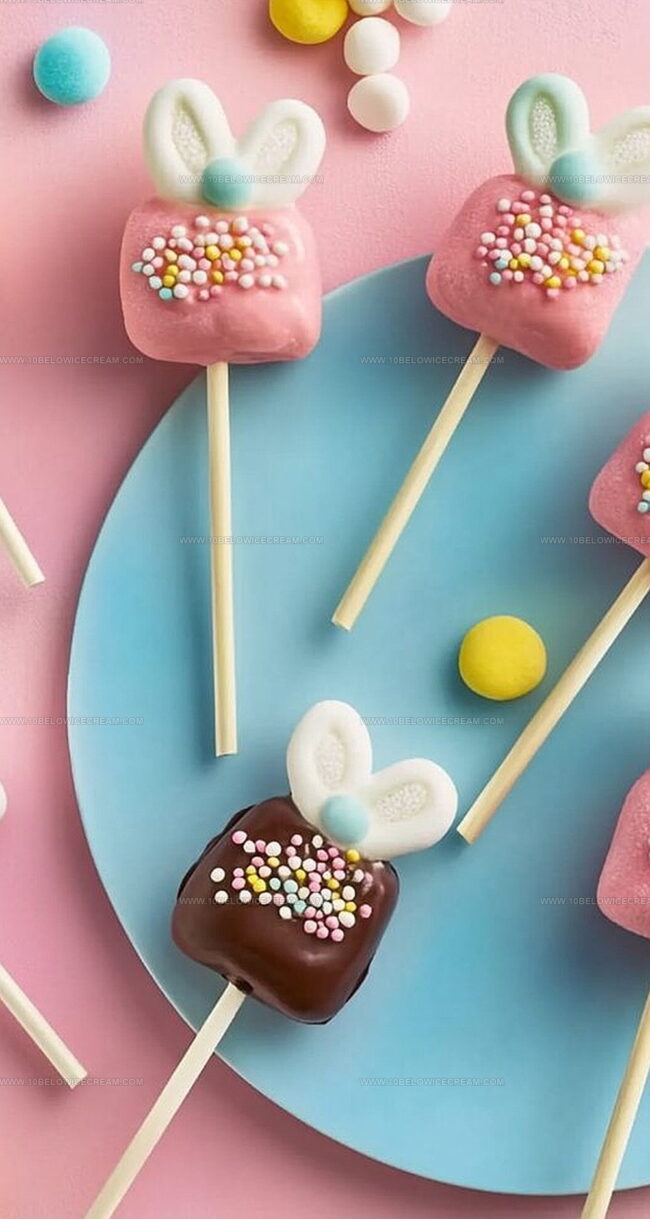
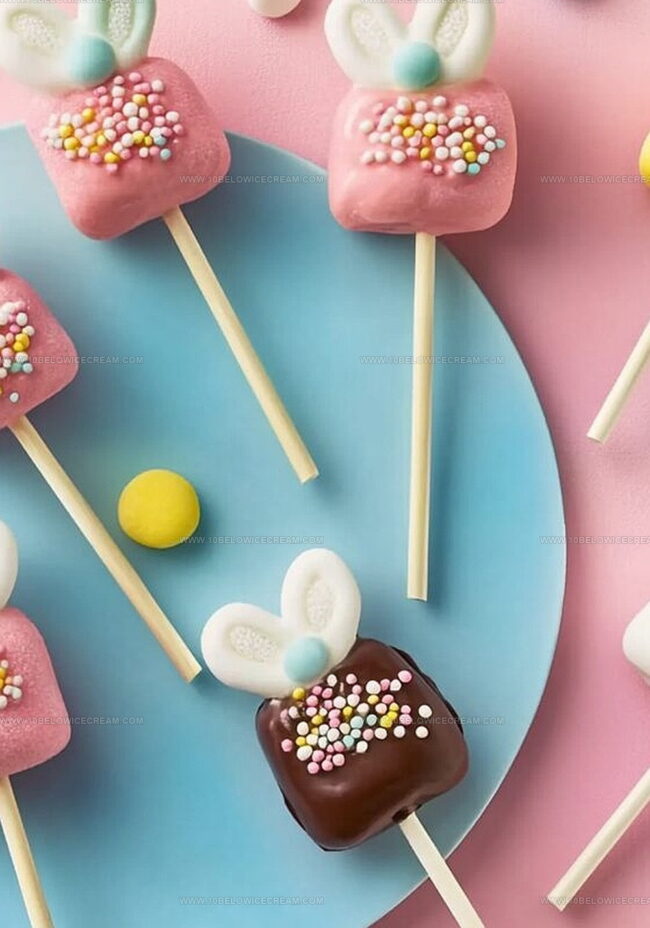
Sweet & Fluffy Marshmallow Bunny Pops Recipe: Hop Into Fun
Sweet springtime calls for these adorable marshmallow bunny pops that hop right into your dessert dreams.
Crafting these cute treats becomes a delightful adventure for anyone who loves playful sweets.
Soft marshmallows transform into charming rabbit shapes with just a few simple steps.
Colorful candy melts and sprinkles add whimsical personality to each little bunny creation.
Kids absolutely adore helping decorate these cheerful treats that look almost too cute to eat.
Pastel colors and creative decorations make these pops perfect for Easter gatherings or springtime celebrations.
You’ll want to gather your friends and start making magic in the kitchen with these delightful bunny-inspired treats.
Why Bunny Pops Are the Cutest Treat Ever
What You Need for Marshmallow Bunny Pops
Main Ingredients:Candy Coating:Decorative Touches:Easy Steps to Make Adorable Bunny Pops
Step 1: Prepare Marshmallow Bases
Grab your marshmallows and lollipop sticks. Carefully push each stick into the center of a marshmallow, making sure it’s secure and stands upright without wobbling.
Step 2: Create White Candy Coating
Melt white candy melts in a microwave-safe bowl. Heat in short 30-second intervals, stirring between each burst until the mixture becomes completely smooth and glossy.
Step 3: Dip Marshmallow Bottoms
Dunk the bottom half of each marshmallow into the melted white candy. Gently tap off excess coating and place on a parchment-lined baking sheet to set.
Step 4: Add Bunny Ear Details
Melt pink candy melts in a separate bowl. Dip the top portion of each marshmallow at an angle to create adorable bunny ear shapes.
Allow the pink coating to drip slightly for a natural look.
Step 5: Design Cute Bunny Tail
Attach two small mini marshmallows to the bottom of each pop using a tiny dab of pink candy melts as glue.
Step 6: Add Magical Sparkle
Sprinkle edible glitter or colorful sugar sprinkles over the bunny pops for extra whimsy and charm.
Step 7: Let Pops Set Completely
Allow the marshmallow bunny pops to rest at room temperature until the candy coating hardens completely.
This ensures a perfect, smooth finish.
Tips to Shape and Decorate Bunny Pops Like a Pro
Creative Bunny Pop Ideas to Try Next Time
What to Serve with Bunny Pops at Parties
Storing Your Marshmallow Bunny Pops Right
Bunny Pop FAQs Just for You
Insert the stick gently but firmly into the marshmallow’s center, pushing about halfway through. Make sure the stick is secure and not wobbling before dipping in candy coating.
Absolutely! You can customize the candy coating colors to match your theme or preference. Use pastel colors like lavender, blue, or yellow for a fun variation.
Use high-quality candy melts specifically designed for coating. Brands like Wilton or Merckens work well and provide smooth, easy-to-use melting consistency.
Prepare all materials in advance, set up a work station with parchment paper, and have decorating tools ready.
Print
Adorable Marshmallow Bunny Pops Recipe
- Total Time: 25 minutes
- Yield: 10 1x
Description
Sweet chocolate-dipped marshmallow bunny pops bring whimsical Easter charm to any celebration. Cute marshmallow bunnies on sticks become delightful treats kids will adore, perfect for springtime gatherings with family and friends.
Ingredients
Main Ingredients:
- 10 large marshmallows
- 10 lollipop sticks
Coating and Decoration:
- 1/2 cup (120 milliliters) pink melting candy
- 1/2 cup (120 milliliters) white melting candy
- 1/4 cup (60 milliliters) mini marshmallows
Finishing Touches:
- 1/4 cup (60 milliliters) edible glitter or sprinkles (optional)
Instructions
- Pierce each marshmallow with a lollipop stick, ensuring firm attachment and stability.
- Utilize a microwave-safe container to gently liquefy white confectionery coating, stirring at 30-second intervals until achieving a silky consistency.
- Delicately immerse each marshmallow into the melted white coating, covering approximately half the surface, then position on parchment paper for cooling and solidification.
- After white coating sets completely, warm pink confectionery coating and dip marshmallow tops to craft distinctive bunny ear shapes.
- Attach miniature marshmallows at the base using a small dollop of pink coating to create an adorable bunny tail effect.
- For enhanced visual appeal, dust the marshmallow pops with shimmering edible glitter or festive sprinkles.
- Allow treats to fully solidify at room temperature for approximately 15-20 minutes before serving or packaging.
Notes
- Stick Placement Matters: Push lollipop sticks gently but firmly into marshmallows to prevent wobbling during decorating.
- Melting Magic: Use low microwave power and short intervals to prevent candy coating from burning or becoming lumpy.
- Temperature Control: Allow melted candy to cool slightly before dipping to achieve a smoother, more even coating on marshmallows.
- Decorative Alternatives: Swap edible glitter with colored sugar or crushed candy for different texture and visual appeal, making these treats customizable for various celebrations.
- Prep Time: 10 minutes
- Cook Time: 15 minutes
- Category: Desserts, Snacks
- Method: Dipping
- Cuisine: American
Nutrition
- Serving Size: 10
- Calories: 150
- Sugar: 25 g
- Sodium: 30 mg
- Fat: 4 g
- Saturated Fat: 2 g
- Unsaturated Fat: 2 g
- Trans Fat: 0 g
- Carbohydrates: 29 g
- Fiber: 0 g
- Protein: 1 g
- Cholesterol: 0 mg
Olivia Brooks
Contributing Writer
Expertise
Education
Culinary Institute of America
Accelerated Culinary Arts Certificate Program
Focus: Culinary fundamentals, nutrition, and healthy cooking technique
Olivia believes good food should feed both the body and the soul. She earned her Accelerated Culinary Arts Certificate from the Culinary Institute of America, where she focused on nutrition and practical cooking techniques that make healthy eating easy.
At 10 Below Ice Cream, Olivia shares single-serving recipes that are fresh, plant-forward, and full of heart. She loves helping people eat better, without stress, strict rules, or sacrificing flavor.
Beyond the kitchen, Olivia spends her time tending her backyard garden, practicing yoga, and discovering hidden gems in Portland’s food scene.